Sunday, October 30, 2011

The One Handed Bowline - Definitely a New Approach Here

I'll begin by building a historical perspective on the development of this knot.  My first self-taught one-handed-knot was the clove hitch.  It took over 3 hours to map out the sequence of steps.  My second attempt at developing a one handed knot was the bowline.  It was a mystical moment and only took 20 minutes to sequence the steps.

 There is a traditional method for tying this knot one handed where the wrist becomes captured in a loop.  If you're ever in a situation where capturing your wrist may be concern, try this new approach as an alternative.  I like how the fingers can more readily slip away if needed.  However, capturing body parts is tricky anytime that rope becomes suddenly loaded.

There's the big rope tying principle at work here.  The key to knot tying is the opening hold.  For some reason, I picked up the rope as shown below on my first try.  I have stayed with that hold ever since: it flows nicely.
Where the rope lays between the fingers is important.  The end of the rope is next to the pointer finger.  The up rope is coming out of the small finger.  The hand is holding the loop that will eventually become a bowline.

From this position, the hand is folded.  The small finger points out - behind the up rope.  Everything for a reason.
Without changing the finger positions, turn the hand over.  Then the folded fingers can open.  See the characteristic small loop.  It circles around the three middle fingers.

The end of the rope will now progress counter clock-wise around the rope.  This positions the end of the rope to reeve through the small loop on the three fingers.  To start the rotation in the correct direction change the position of the end of the rope.  Take it from the front-side to the backside - as illustrated above.  Then keep wrapping it around.  That's a counter clockwise motion.


In the above picture, the end of the rope is laying across the loop.  It's worked down into the loop as the next step. It arrives at the image below.
Dress it.
Here's the finished view as follows:
The final view will help clarify how the end of the rope wraps around counter clockwise and reeves through the small loop.

The Youtube version will provide the flow of it.
Practice it.  Enjoy it.

The photos that follow will be the essential stages minus the hand.  The purpose is to help you visualize the knot.


Friday, October 28, 2011

The Bowline Knot from A New Perspective

Think of the bowline as a combination of a loop, a bight and another special bight that captures the other bight.  The sequence is to pull the bight through the loop.  A slip knot has formed.


The end of the rope captures the bight.  Upon capture the end of the rope forms this special bight.  Finally, the bight is pulled through loop.  It reverses a prior step.  The end of the rope follows.  Now this is the bowline.


The second image above is the completed bowline.  It was formed by capsizing the slip knot.  Thus a bowline can be formed from a slip knot.  The opposite is true.  A bowline can roll into slip knot and fail.  To stabilize the bowline, it's common to tie off the end of the rope.  Here the Yosemite tie-off is being used.  The end of the rope traces the up-rope.  Finally, a double fisherman provides additional security.

Thursday, October 27, 2011

The Programmable Code of Knot Tying

The essential language code behind knot tying consists of the bight, the loop and the elbow.  From these basic elements knots are formed.  How these elements are combined and how the shapes are captured define the resulting knot.

Here's an illustration of combining the code!  Form a loop and a bight separately.  Twist the loop into an elbow. These are the essential shapes.  Now starts the combining and capturing process. Fold the elbow (a stack of two loops).  Pull the bight through the center of that folded elbow.  The result is a scaffold knot for connecting to a carabiner.

Make the Blakes Hitch by Tracing the Contour of Your Hand

Besides describing the Blakes Hitch used for tree climbing, this post reveals two principles of my approach to knot tying: 1) use the contour of your hand 2) how you hold the two ropes on the first step is important.


The parts being illustrated are the carabiner tied to a split tail with a buntline knot.  The split tale wraps around the climbing rope (gray).  The split tail is finished with a fisherman to keep it from backing out.  The area between the carabiner and climbing rope is commonly referred to as the bridge.

Here's the recipe for tying the Blakes hitch.  Wrap around your thumb twice.  Wrap off of your thumb twice.  Pull the rope across the coils placing it over the bridge.  Wrap in the opposite direction around the climbing rope.  Finally reeve the end of the rope between the 2nd and 3rd coil.  Use a fisherman as a back-up

Here's a video for you: http://www.youtube.com/watch?v=8twEso5I1jE

A Method for Learning Knots

Here's a recipe for deepening your knot skill.  Tie your knot then take photos of it as you untie it.  Rotate the knot to capture the shape from multiple viewing points.  When you reverse the order of your photos and page through them, you have created a step by step procedure on how to tie that knot.

This accomplishes two important dynamics that deepen your knot skill: 1) Photography motivates you to spend time and absorb the shape of the knot.  2) Photography documents your knot method for future viewing and reinforces memory of it over a longer span of time.

If you're motivated to do more, then draw them!

Here's an example, using the fisherman knot.  It's in the order that it was photographed, starting with the finished knot followed by the stages of untying it.

Study of these images begins to reveal the key shapes that make up the fisherman.  Imagine a loop.  An elbow is made with a twist of the loop.  The end of the rope reeves through the two loops of the elbow.  Then the rope is finished.

Wednesday, October 26, 2011

The Sport Belay

The sport belay consists of capturing a bight of rope through a ring with a carabiner.  Used beneath a descending device, it serves as a back-up or auto-block.  It also can smooth out the descent on a rappel.  Because it's simple and robust, this is a good system to know!

Sunday, October 23, 2011

The Clove Hitch

I think of the clove hitch as two identical loops.  The second is placed behind the first.  The clove hitch is important for attaching to the middle of a rope.  Don't attach to the end of a rope, because it can crawl off the rope and cause injury.  Did you know that there's a rappel device that uses a clove hitch.  Unfortunately, there are multiple combinations of loops that fail to make the secure clove hitch.  Thus learn it well.

Here's a skill drill for you.  Which image forms the clove hitch?  Which two images would hold you?

Here are the answers. Number 4 forms the clove hitch.  Number 5 forms a girth hitch.  Thus 4 and 5 will hold you.  The others are potential mistakes, so please be careful in your adventures.

Did you know that the clove hitch makes good one handed knot tying practice?  Here's a sample of that: http://www.youtube.com/watch?v=K-4RMnULYIM

The Quick Prusik

The standard method for making the Prusik in literature is to wind a loop on a straight rope; this represents a cumbersome reeving method with definite downsides.  It takes longer and the coils of the loop tend to twist.  In other words, there's significantly more dressing of the knot.  This is effort that interrupts the fluidity of the ascent on rope.  Skilled climbing is about embedding your knot skill, which allows your focus to shift into judging the next step - not fiddling with rope kinks.  Would you like to tie a Prusik in less than 10 seconds?

What follows reveals two secrets of advanced knot tying.  Tying bight on bight is key to rapid knot tying. Secondly, how ropes are held in the opening step of knot tying is vitally important.

For the Prusik, start with this initial hold - in the above illustration.  The thicker rope is your climbing rope.  The thinner rope is a loop formed by a double fisherman's knot.  Notice the absence of straight lines.  Gravity forms this tremendously beneficial shape called the bight.  The bight of the loop intersects the bight of the climbing rope.  It's a powerful tying position, not explained in the standard literature.

The double fisherman's knot is used as a handle and wound around the climbing rope.  This step also positions this bulky knot out of the way.

Note that the effort is made to form the top three wraps or coils.  They're held in an organized fashion.  The winding below the double fisherman's knot is allowed to flow down the rope.  Effectively these wraps are ignored during this stage.  They become organized in the next step.

Here's the key configuration that aligns everything. It's formed by pulling the two bights of rope in opposite directions.  For example, hold the climbing rope bight in your left hand and the loop in your right hand.  Then pull your hands apart.  The Prusik coil which wraps both climbing strands is called the bridge.  Keep it positioned at the bottom during your pull.
When you straighten your climbing rope, the Prusik snaps into place.  This all happens in less than 10 seconds once the steps are practiced.

This Youtube video will help you: http://www.youtube.com/watch?v=6TuGDsoi-Oo


Make Your Knots Right - The Blake's Hitch

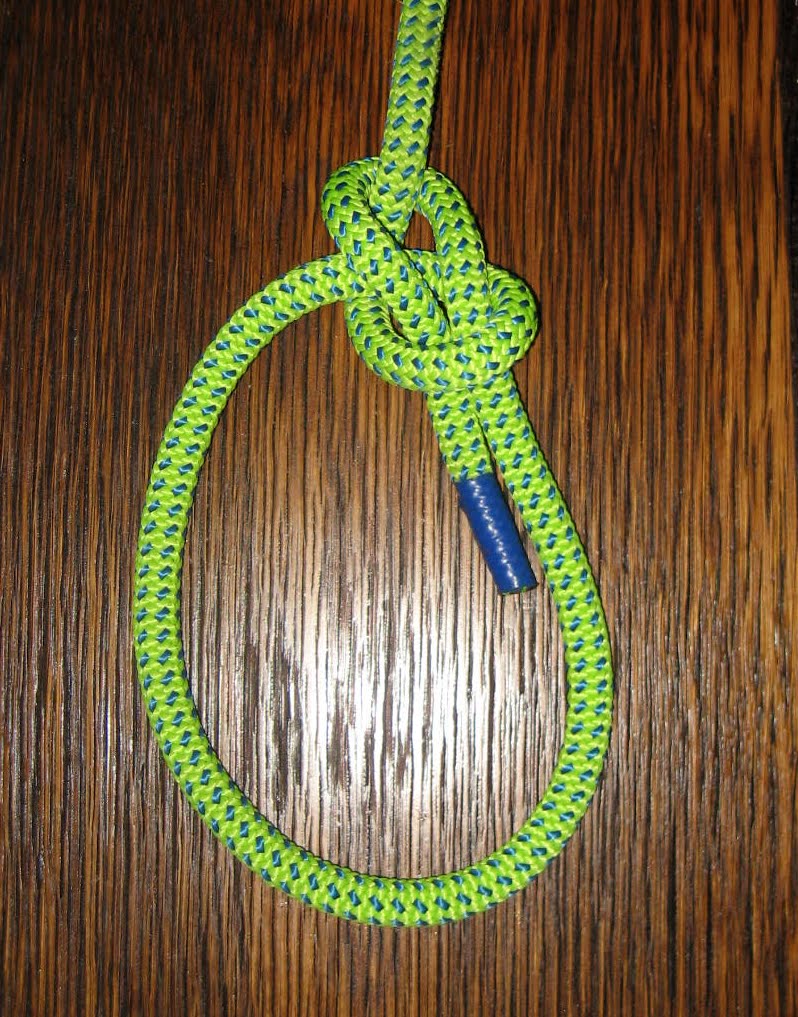
Tying knots correctly is the cornerstone of rigging safety.  I have found knots incorrectly illustrated on the internet - namely the Blake's hitch, the bowline and the buntline.  To my surprise, those posts aren't corrected when the owner is notified and informed about their error.  Thus it's time to take a critical look at a particular attachment knot and learn a method of tying that mitigates errors.  Here the focus will be on the Blake's hitch.  It's an essential climbing knot to know.  It also finds use in common place activities where rope tension needs to be maintained. 
My climbing career had a feeble start in 1980.  A variant of the taut line provided the friction hitch attachment.  That weak knot combined with the use of a three strand laid nylon rope, led to fixing loose coils and managing frequent slips while in the canopy.  When the Blake's hitch came out in the 90's, there was a sense of elation.  Here was a knot that was stable in the rigors of a climb and that was highly reliable in its hold.  Moreover, it was a beautiful knot.
The story doesn't end there.  The Blake's hitch can be tied wrong.  The result is a weak knot that slips more than it holds.  However, if tied around the contour of the hand, the mind does a better job of tracking the progress of the knot, which ensures its correctness.  I have caught myself tying it wrong.  How does that happen?  Whenever the knot is rotated and my eyes are distracted, a visual orientation is lost.  By using the hand as a template, the brain has a solid reference point on what's right.
To best understand the Blake's hitch illustration below, consider the various parts of the knot.  The gray line is the climbing rope.  Part #1 makes the attachment point to the climber and forms the first coil.  Part #1 and #2 are made as loose coils.  Part #3 and #4 are snugly coiled around the gray rope.  Part #5 is critical for compressing the coils together.  That compression is established by threading #5 up through the center of the coils formed by #1 and #2.  An in-line fig-8 serves as a stopper knot on the tail of #5.  
 
Blakes Hitch
The knot is complete when tightened and loaded by the climber.  Friction hitches like the Blake's hitch are mechanical devices that replace the grip of a human hand.  The coiled rope physically performs the function of curled fingers in a death grip.  Indeed, the orientation of this imaginary human hand is with the thumb placed in the down rope direction.  This thumbs down orientation best simulates the dynamic of the Blake's hitch.
Where part #1 forms a coil on the climbing rope, the majority of the climber's weight loads there.  A pinch is established on part #5 like the thumb pinches the first finger: although, it does it with tremendous mechanical advantage.  As designed, the climber's weight seemingly welds the lower part of the knot to the climbing rope.  The climber takes weight off and the knot can slide up with the push of a hand.  It locks again when the climber sits in the harness.  It goes down rope when the top of the knot is pulled down.
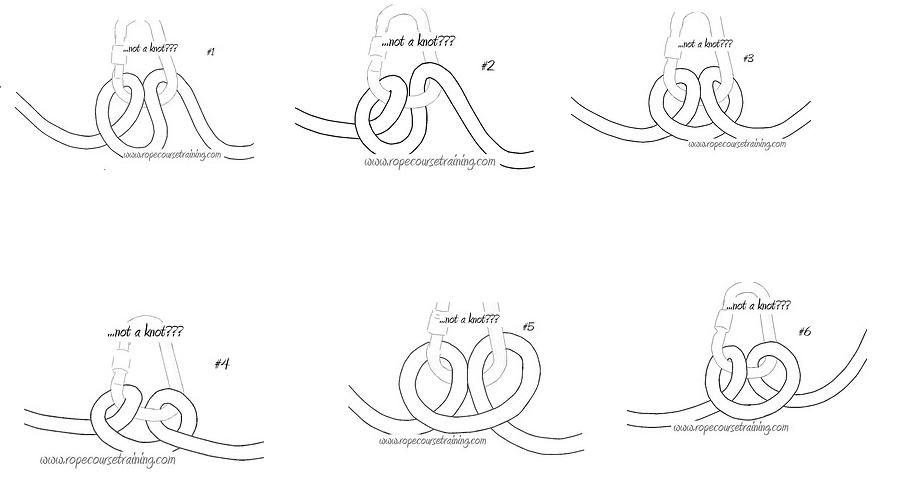
Here's how to take a good thing and mess it up - as illustrated below.  If part #5, goes on the opposite side of the climbing rope, a horrible slide results. How?  As part #1 pulls part #5 down, part #4 is pulled down.  There is no lower pinch in the knot to resist gravity.  The climbers weight is transfered to part #4 - the top of the knot.  As already indicated on normal use, the hand presses down on part #4 to start a descent.  With this knotting error, part #5 is mechanically performing a descent, and it's independent of the climber.  To arrest the descent, the climber has to get off the knot.  Please, appreciate the fact that there's not a significant visual difference between the right and wrong formation.
 
Dangerous Knot
Knots are traditionally taught by the flying rope method.  The end of the rope flies through space and encircles the target.  This tying approach puts quite the strain on the brain.  This strategy fails to reinforce knot memory and knotting consistency.  It takes brute force to establish a reliable skill that way.  Seasoned knotters establish quirky touch points and minimize open space paths.  The hand is the best knot template going: the brain likes it.  Here, a rope on hand strategy is applied to the Blake's hitch.
Illustrated below is a method for tying the Blake's hitch by using the contour of the hand.  It starts with part #1 laid between the thumb and first finger.  The fingers grip the climbing rope, and the first two coils (#1 & #2) are made around the thumb.  The next two coils (#3 & #4) go directly around the gray climbing rope.  Part #5  is pulled to compress the coils, and it travels around the thumb opposite to the direction of the coils.  Part #5 is then pulled up through #1 and #2.  Part #5 replaces the thumb position.  A stopper knot is placed on the end of part #5.  The Blake's hitch is complete when tightened and tested.
 
Blakes Hitch Tied to the Contours of the Hand
I have short video on You Tube that can reinforce this discussion.  You can search under "

Blake's Hitch Tied with Contour of the Hand" or you can copy this link as follows:

It's good to develop routines that enforce rigging consistency and quality.  Before using a knot, stop chewing gum, don't answer the cell phone, and stop talking.  Look at your knot and ask yourself, "Did I tie my knot correctly?"

The Value Behind One-Handed Knot Tying

There are numerous circumstances where one handed knot tying is needed.  In climbing on rope, emergency scenarios are likely to employ one handed rescue techniques.  You are giving aid to yourself or to someone else. This may leave only one hand available.  My most frequent use of one handed knot tying comes into practice when I'm testing out a new reach.  My exploratory reach surprisingly becomes the next hold.  Wait!  I didn't prepare my rope in advance!  It's comforting to know that I can tie the right knot with one hand.

I find that one handed knot tying embeds the skill deep within my memory.  My fingers and hand dance to some silent music that results in a well constructed knot. To this day, I'm amazed by this deep brain process - even though I was the one who methodically created the steps for tying all of the climbing knots with one hand.

In my book, the worst thing for learning knots is to reeve a knot on a table top.  Knots are designed to take us out into adventure.  There are no table top adventures.  The best skill is to tie a knot in mid-air (hint: climbing scenario).  The hand is an unchanging template.  It is a knot tying tool.  The best knot tying moves are specific to the contour and movement of the hand. The mission behind this blog is to give you illustrations of that.